 PCFolders
How to cut and paste files on a Mac (4 ways)
Short answer: In Finder press ⌘+C to copy, open the destination, then press ⌥+⌘+V to move the file there. With PCFolders you can use Ctrl+X and Ctrl+V like on Windows.
Finder deliberately has no Cut command for files: the file stays where it is until you decide to move it, so nothing is lost if you never paste. The move happens at the paste step instead.
1. Finder: Command-C, then Option-Command-V
- Select the files and press ⌘+C.
- Open the destination folder.
- Press ⌥+⌘+V. The files are moved, not copied.
2. Drag and drop (and when it copies instead)
Dragging to another folder on the same disk moves the item. Dragging to a different disk copies it — hold Command while dragging to move it instead. Hold Option to force a copy on the same disk.
3. The Edit menu: Move Item Here
After copying, open the Edit menu (or right-click in the destination) and hold Option: Paste Item changes to Move Item Here.
4. Real Ctrl+X and Ctrl+V with PCFolders
PCFolders adds the Windows behavior: Cut marks the files, Paste moves them, and the pasted files stay selected so you can rename or open them right away. Large moves run in the file operation center with progress and conflict choices (Replace, Keep Both, Skip), and Ctrl+Z undoes the last move when it is safe.
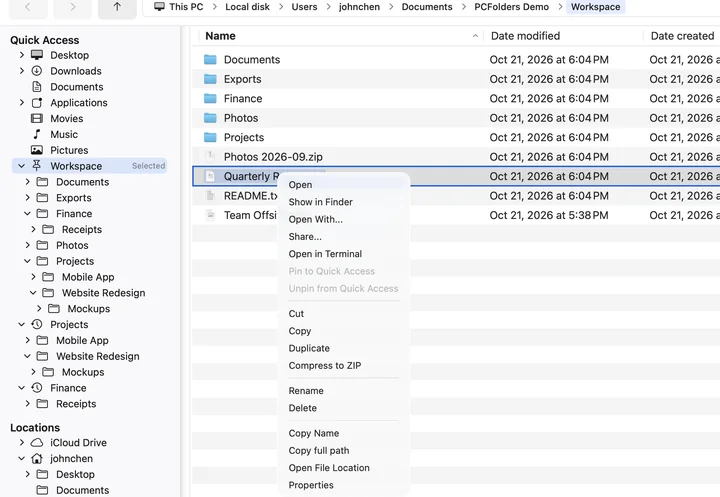
- Select files and press Ctrl+X (Control-X), or right-click → Cut.
- Open the destination in the same tab or another tab.
- Press Ctrl+V.